About
This is a tutorial on how to setup the environment needed for Zoz’s workshop: A Robot Operating System (ROS) tutorial.
For the workshop, you’ll be using the Gazebo simulator to get started with the ROS. The best way to get everything up and running, is to use the prepared Docker image, which this tut will cover.
System requirements
Hardware
In order to run the VMRC Docker container you’ll need to have:
- A modern multi-core CPU, e.g. Intel Core i5
- At least 8 gigs of RAM
- A discrete Nvidia graphics card
It’s possible to run the VMRC without a discrete graphics card, and outside the Docker container by installing it directly to your host OS, but the Gazebo simulator will run slowly.
Software
To run the Docker image, you’ll need the following software:
- A Linux distro, prefferably Ubuntu 16.04 or 18.04 (tested)
- Curl
- Nvidia drivers + Cuda
- Docker CE (and its dependencies)
- Nvidia Docker
The Docker image is very beta-ish, since it was just recently released. While it most certainly can be run on various Linux distros, we’ve had time to test only the Ubuntu distros listed above, and will assume for the rest of this tutorial that you’re using one of them. Feel free to install it on any distro of your flavour, adapting some parts of the tuts. We’re sure you’ve got it covered.
Installing Ubuntu
This one obviously isn’t for you guys who know how to install a distro with a blindfold and one hand tied behind back. But in order to make this workshop accessible even to those who don’t, this part explains how to install a distro. Feel free to skip this one if you’ve already got Ubuntu 16.04 or 18.04 up and running. :)
Creating a bootable USB
Beware of your UEFI/Secure Boot settings while preparing the USB and installing the distro. If you have UEFI enabled, use the GPT option in Rufus and UNetbootin. If you’re running CSM/Legacy mode or don’t have UEFI on your laptop, use the MBR option.
In most cases, using the GPT/UEFI option should work just fine with newer laptops.
You’ll need an USB stick with at least 2 GB of space.
You can find the official Ubuntu tutorials for creating a bootable USB on Mac OS X, Linux and Windows here. Or you can follow the steps below:
- Download Ubuntu 18.04 ISO here. (Checksums available here.)
- Download Rufus (Win) or UNetbootin (Win/Mac OS X/Linux).
- Flash the ISO image on the USB.
- Plug in the prepared USB and reboot your PC.
Most computers will boot from USB automatically. Simply insert the USB flash drive and either power on your computer or restart it.
If your computer doesn’t automatically boot from USB, try holding F12 when your computer first starts. With most machines, this will allow you to select the USB device from a system-specific boot menu.
F12 is the most common key for bringing up your system’s boot menu, but Escape, F2 and F10 are common alternatives. If you’re unsure, look for a brief message when your system starts - this will often inform you of which key to press to bring up the boot menu.
Installation
The official Ubuntu installation guide can be found here. (Steps below adapted from the official tut.)
After booting from the USB, you’ll see the window below.
1. Select your language from the left and select the Install Ubuntu option.

Depending on your computer’s configuration, you may instead see an alternative boot menu showing a large language selection pane (see below). Just select the Install Ubuntu option, and you’ll see the welcome window above in no-time.

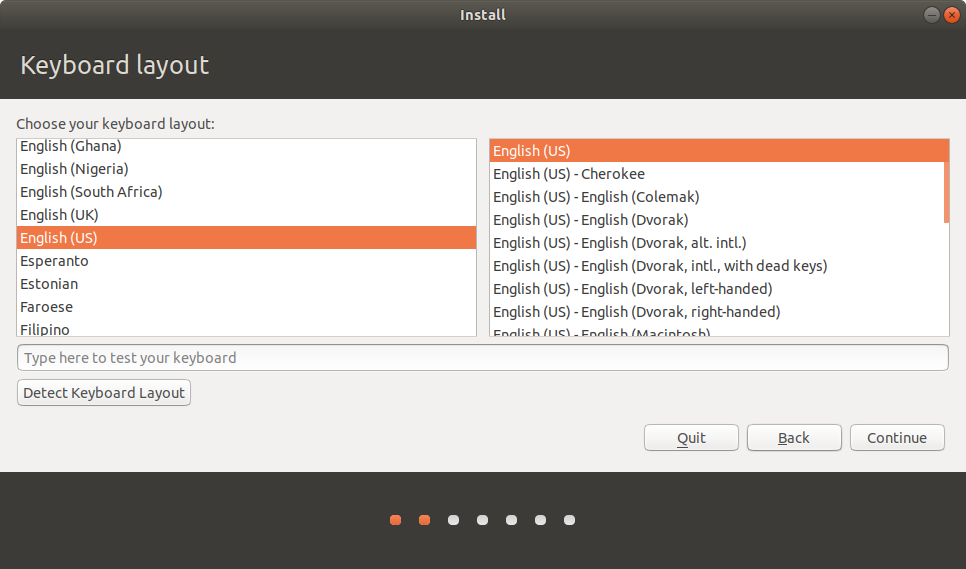
2. Select your keyboard layout
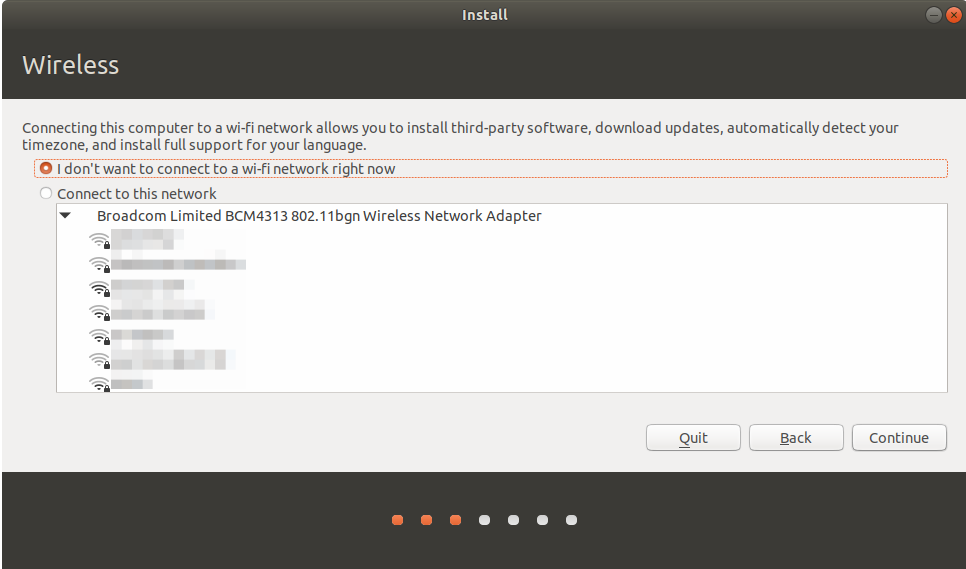
3. Connect to a network (or don’t)
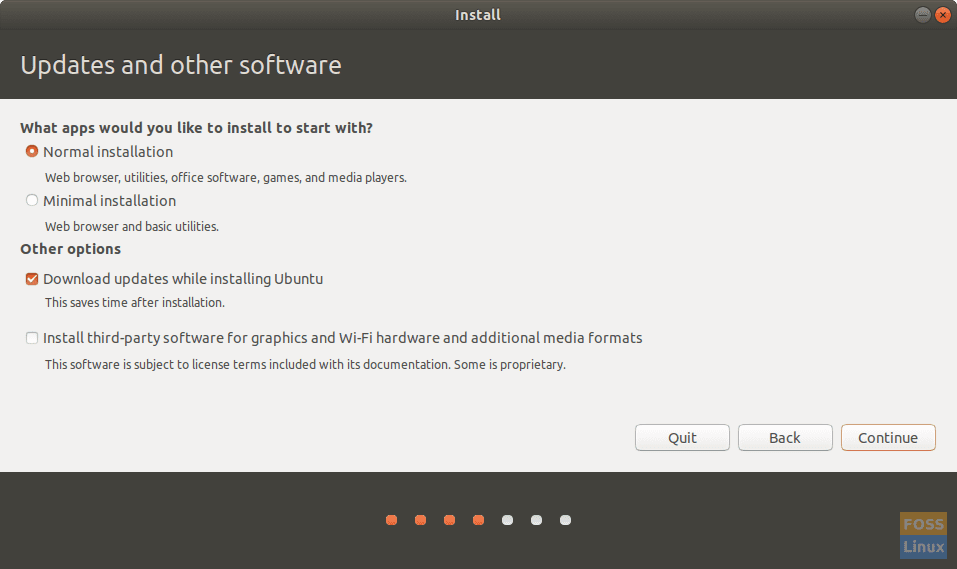
4. Select what to install
The normal instalation should be just fine for this workshop. You can use the minimal installation, but it’ll only make your life harder if you don’t know everything you’re doing. Also it’s OK to download updates while installing Ubuntu.
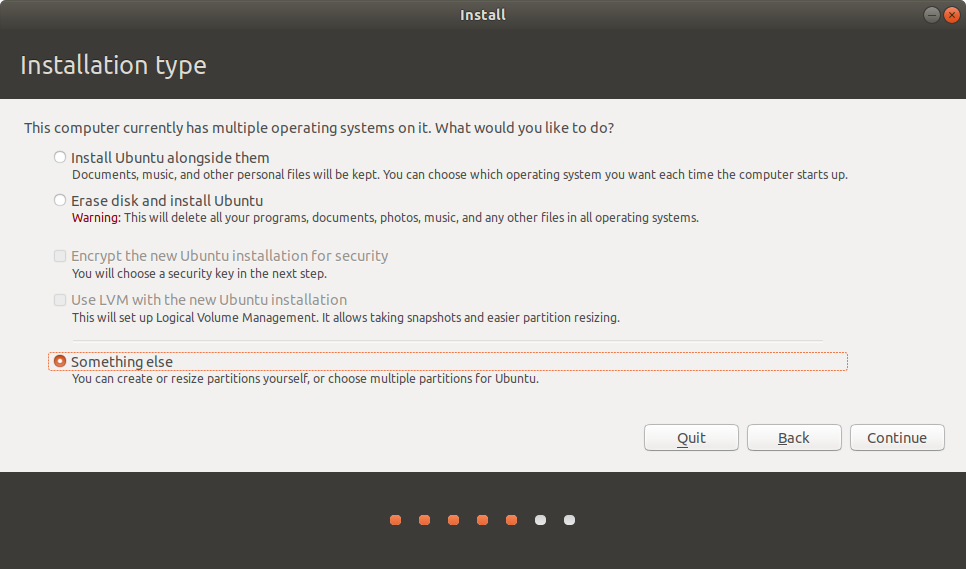
5. Select your installation type
You can install Ubuntu alongside already existing operating systems, and you should if you’re a beginner and already have one on your laptop. Or you can partition it your way by selecting something else.
We’ll assume you’re installing Ubuntu alongside an already existing OS. If you’re not, just skip the next step.
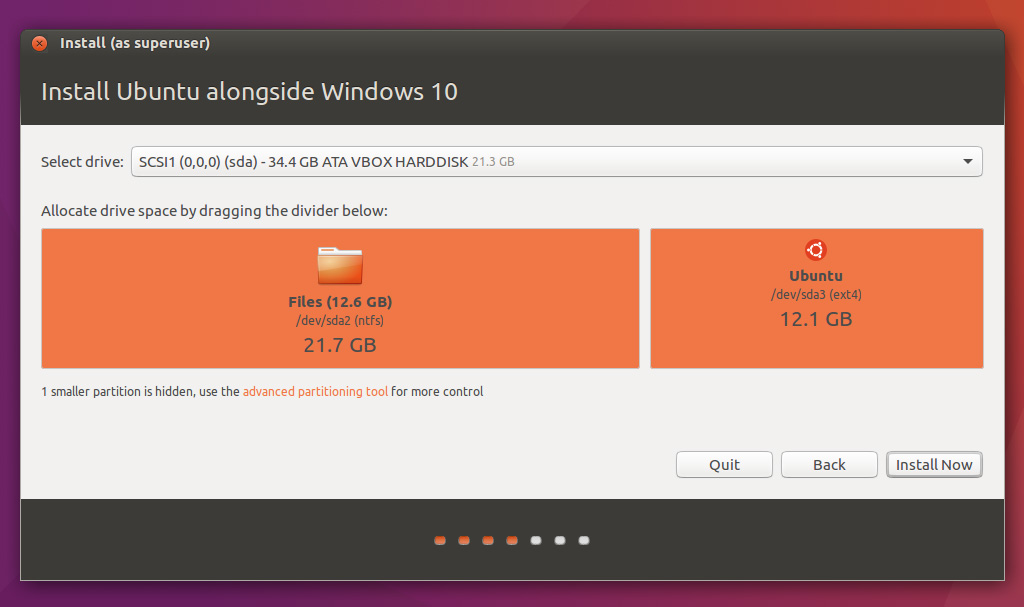
6. Install Ubuntu alongside an OS
Move the divider to adjust the amount of space you want to give to your Ubuntu installation and click install now.
7. Enter the rest of your information
Select your geolocation.

Create your username and password.

8. You should be done!
Feel free to reboot your PC and boot into Ubuntu.

Installing the software
After booting into your Linux distro, we can begin installing the prerequisites and build our Docker image afterwards.
Installing Nvidia drivers and CUDA 9
sudo add-apt-repository ppa:graphics-drivers/ppa

sudo apt update

sudo apt install nvidia-drivers-390
If you have Secure Boot enabled, it may seem that the installation is stuck at building initial module for 4.15.0-23-generic on Ubuntu 18.04.
It is not stuck, it’s actually asking you for your password.
Enter your password and press enter twice to continue.
Reboot!
sudo apt install nvidia-cuda-toolkit gcc-6

nvcc --version
Installing prerequisites
0. Remove old versions of Docker if installed:
sudo apt-get remove docker docker-engine docker.io1. Install the following dependencies:
sudo apt-get install apt-transport-https ca-certificates curl software-properties-common2. Add the official Docker GPG key:
curl -fsSL https://download.docker.com/linux/ubuntu/gpg | sudo apt-key add -3. Add the stable package repository:
sudo add-apt-repository "deb [arch=amd64] https://download.docker.com/linux/ubuntu $(lsb_release -cs) stable"4. Install Docker CE:
sudo apt-get update && sudo apt-get install docker-ce5. Test your Docker installation:
You should see the Hello from Docker! message if your installation was successful.
sudo docker run hello-world6. Install Nvidia Docker:
curl -s -L https://nvidia.github.io/nvidia-docker/gpgkey | sudo apt-key add -

distribution=$(. /etc/os-release;echo $ID$VERSION_ID)

curl -s -L https://nvidia.github.io/nvidia-docker/$distribution/nvidia-docker.list | \

sudo tee /etc/apt/sources.list.d/nvidia-docker.list

sudo apt-get update
7. Install Nvidia Docker v2:
sudo apt-get install -y nvidia-docker28. Restart the Docker daemon:
sudo service docker restart9. Add your user to the docker group:
sudo usermod -a -G docker $USERReboot or logout!
10. Verify the installation:
docker run --runtime=nvidia --rm nvidia/cuda nvidia-smiYou should get a window that looks like this:

Building and running the image
Download the image and the scripts:
mkdir -p ~/vmrc_docker/vmrc && cd ~/vmrc_docker/vmrc

wget https://bitbucket.org/osrf/vmrc/raw/default/docker/vmrc/Dockerfile

cd ..

wget https://bitbucket.org/osrf/vmrc/raw/default/docker/build.bash

wget https://bitbucket.org/osrf/vmrc/raw/default/docker/run.bash

chmod u+x build.bash run.bash
Build the image:
./build.bash vmrcRun the container:
./run.bash vmrcTest the installation:
roslaunch robotx_gazebo sandisland.launchIf all is well, you should get an image like this, and you’re done:

You can open up another session to your container from your host OS using:
docker exec -it <YOUR_CONTAINER_ID> bashIf you want to test the buoy, start another session to your docker container, while running the previous roslaunch command, and use the rostopic tool to send commands to the buoy:
rostopic pub --once /cmd_drive usv_gazebo_plugins/UsvDrive '{left: 1.0, right: 1.0}'The upper command should move the buoy forward!